How to Design Custom Hats with No Minimum Like a Pro
Creating the perfect custom hat with no minimum is easier than you think—especially with the right tips and tricks. Whether you’re designing for personal use, a small business, or a special event, you can create a standout design without needing to order in bulk. By focusing on the details like colors, patch designs, and hat styles, you’ll have a custom hat that’s both stylish and functional.
In this blog, we’ll guide you step-by-step through the design process and share pro tips for making the most of no-minimum custom hats.

Why Custom Hats with No Minimum Are Game-Changers
1. No Bulk Order Stress
You can order just one hat or a few, making this a flexible option for individuals, small groups, or one-time events.
2. Cost-Effective for Small Projects
No-minimum hats eliminate the high upfront costs of bulk orders, letting you create high-quality, personalized items without breaking the bank.
3. Endless Customization Options
From leather patch shapes to color combinations, no-minimum hats let you get creative without worrying about a large-scale commitment.
Step-by-Step Guide to Designing Custom Hats Like a Pro
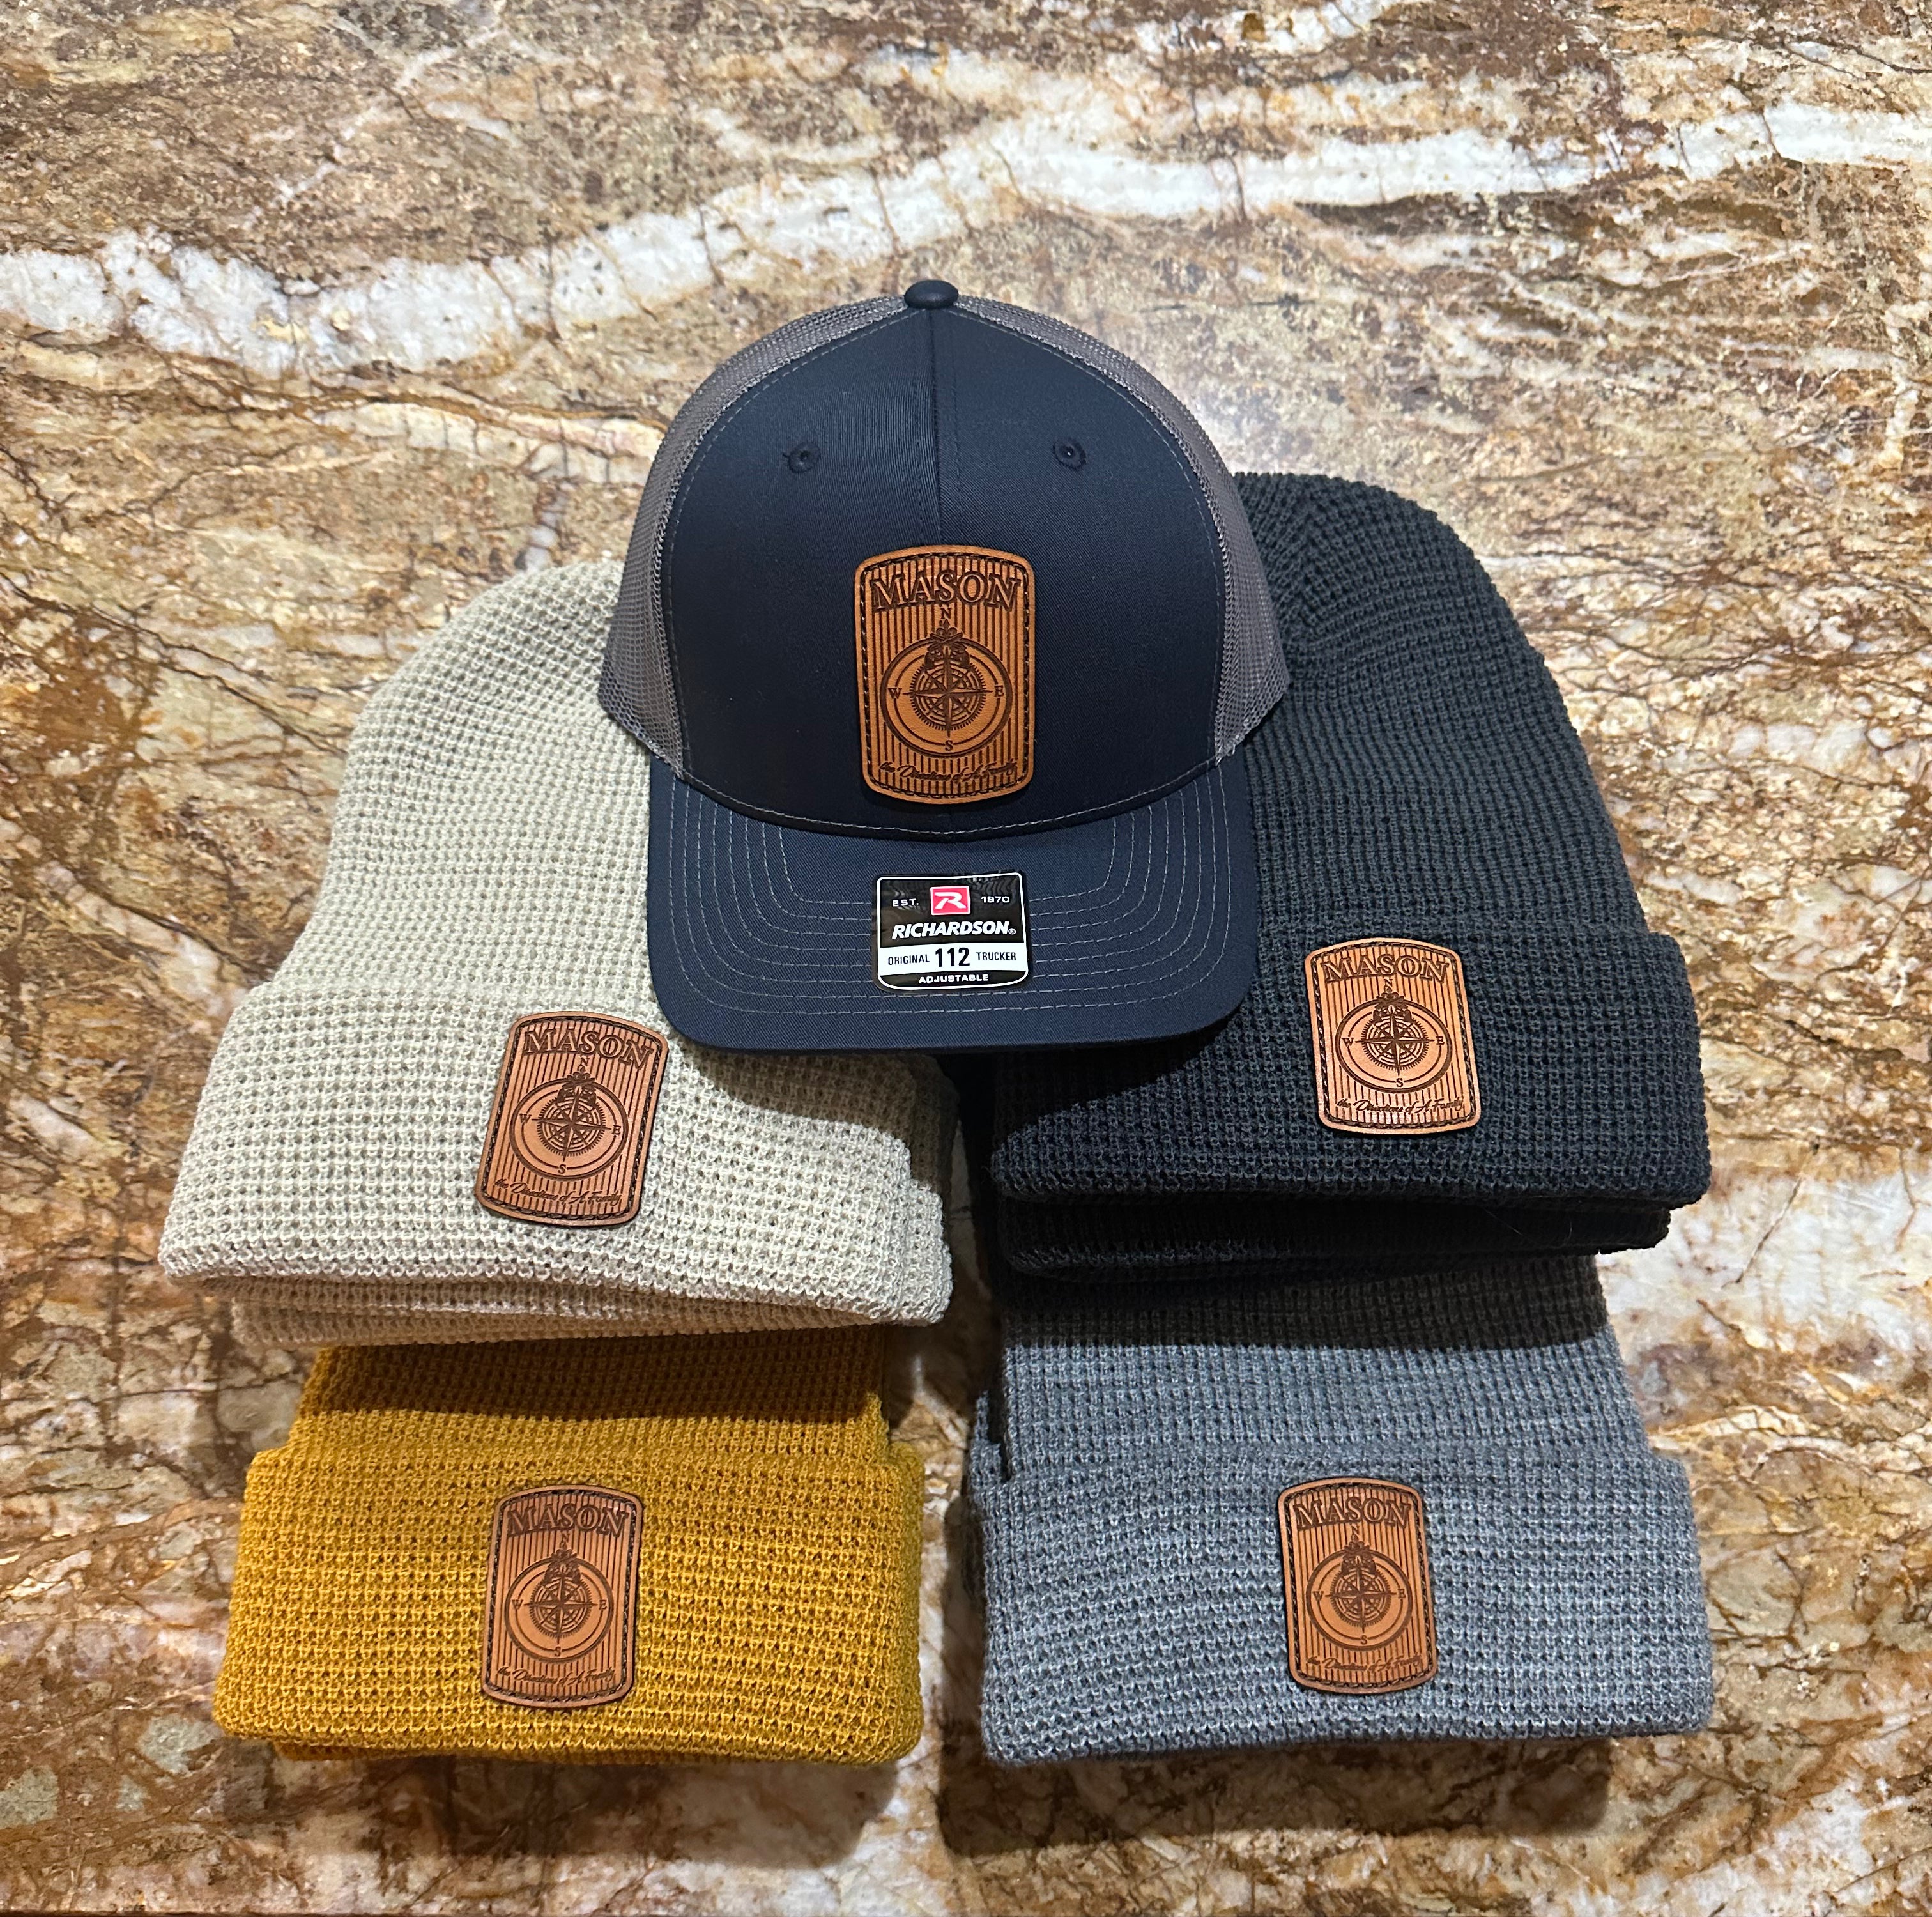
Step 1: Choose Your Hat Style
Start by selecting the right hat style for your needs. Outer Wings offers a range of Richardson hats, each suited to different occasions and preferences:
- Richardson 112: A classic trucker hat with a structured fit and breathable mesh back, perfect for outdoor activities and casual wear.
- Richardson 115: Low-profile and sleek, ideal for a modern, fitted look.
- Richardson 168: A bold seven-panel flat-bill hat for those who want a contemporary edge.
- Richardson 256: A retro-inspired rope hat with UPF 50+ sun protection for long days outdoors.
- Richardson 253: High-profile corduroy hat for a unique, vintage-inspired look.
- Richardson 935: Lightweight, water-resistant, and packable, perfect for outdoor adventures.


Pro Tip: Consider the occasion and functionality when choosing your hat style. For example, a Richardson 112 is great for outdoor adventures, while a Richardson 168 makes a bold fashion statement.
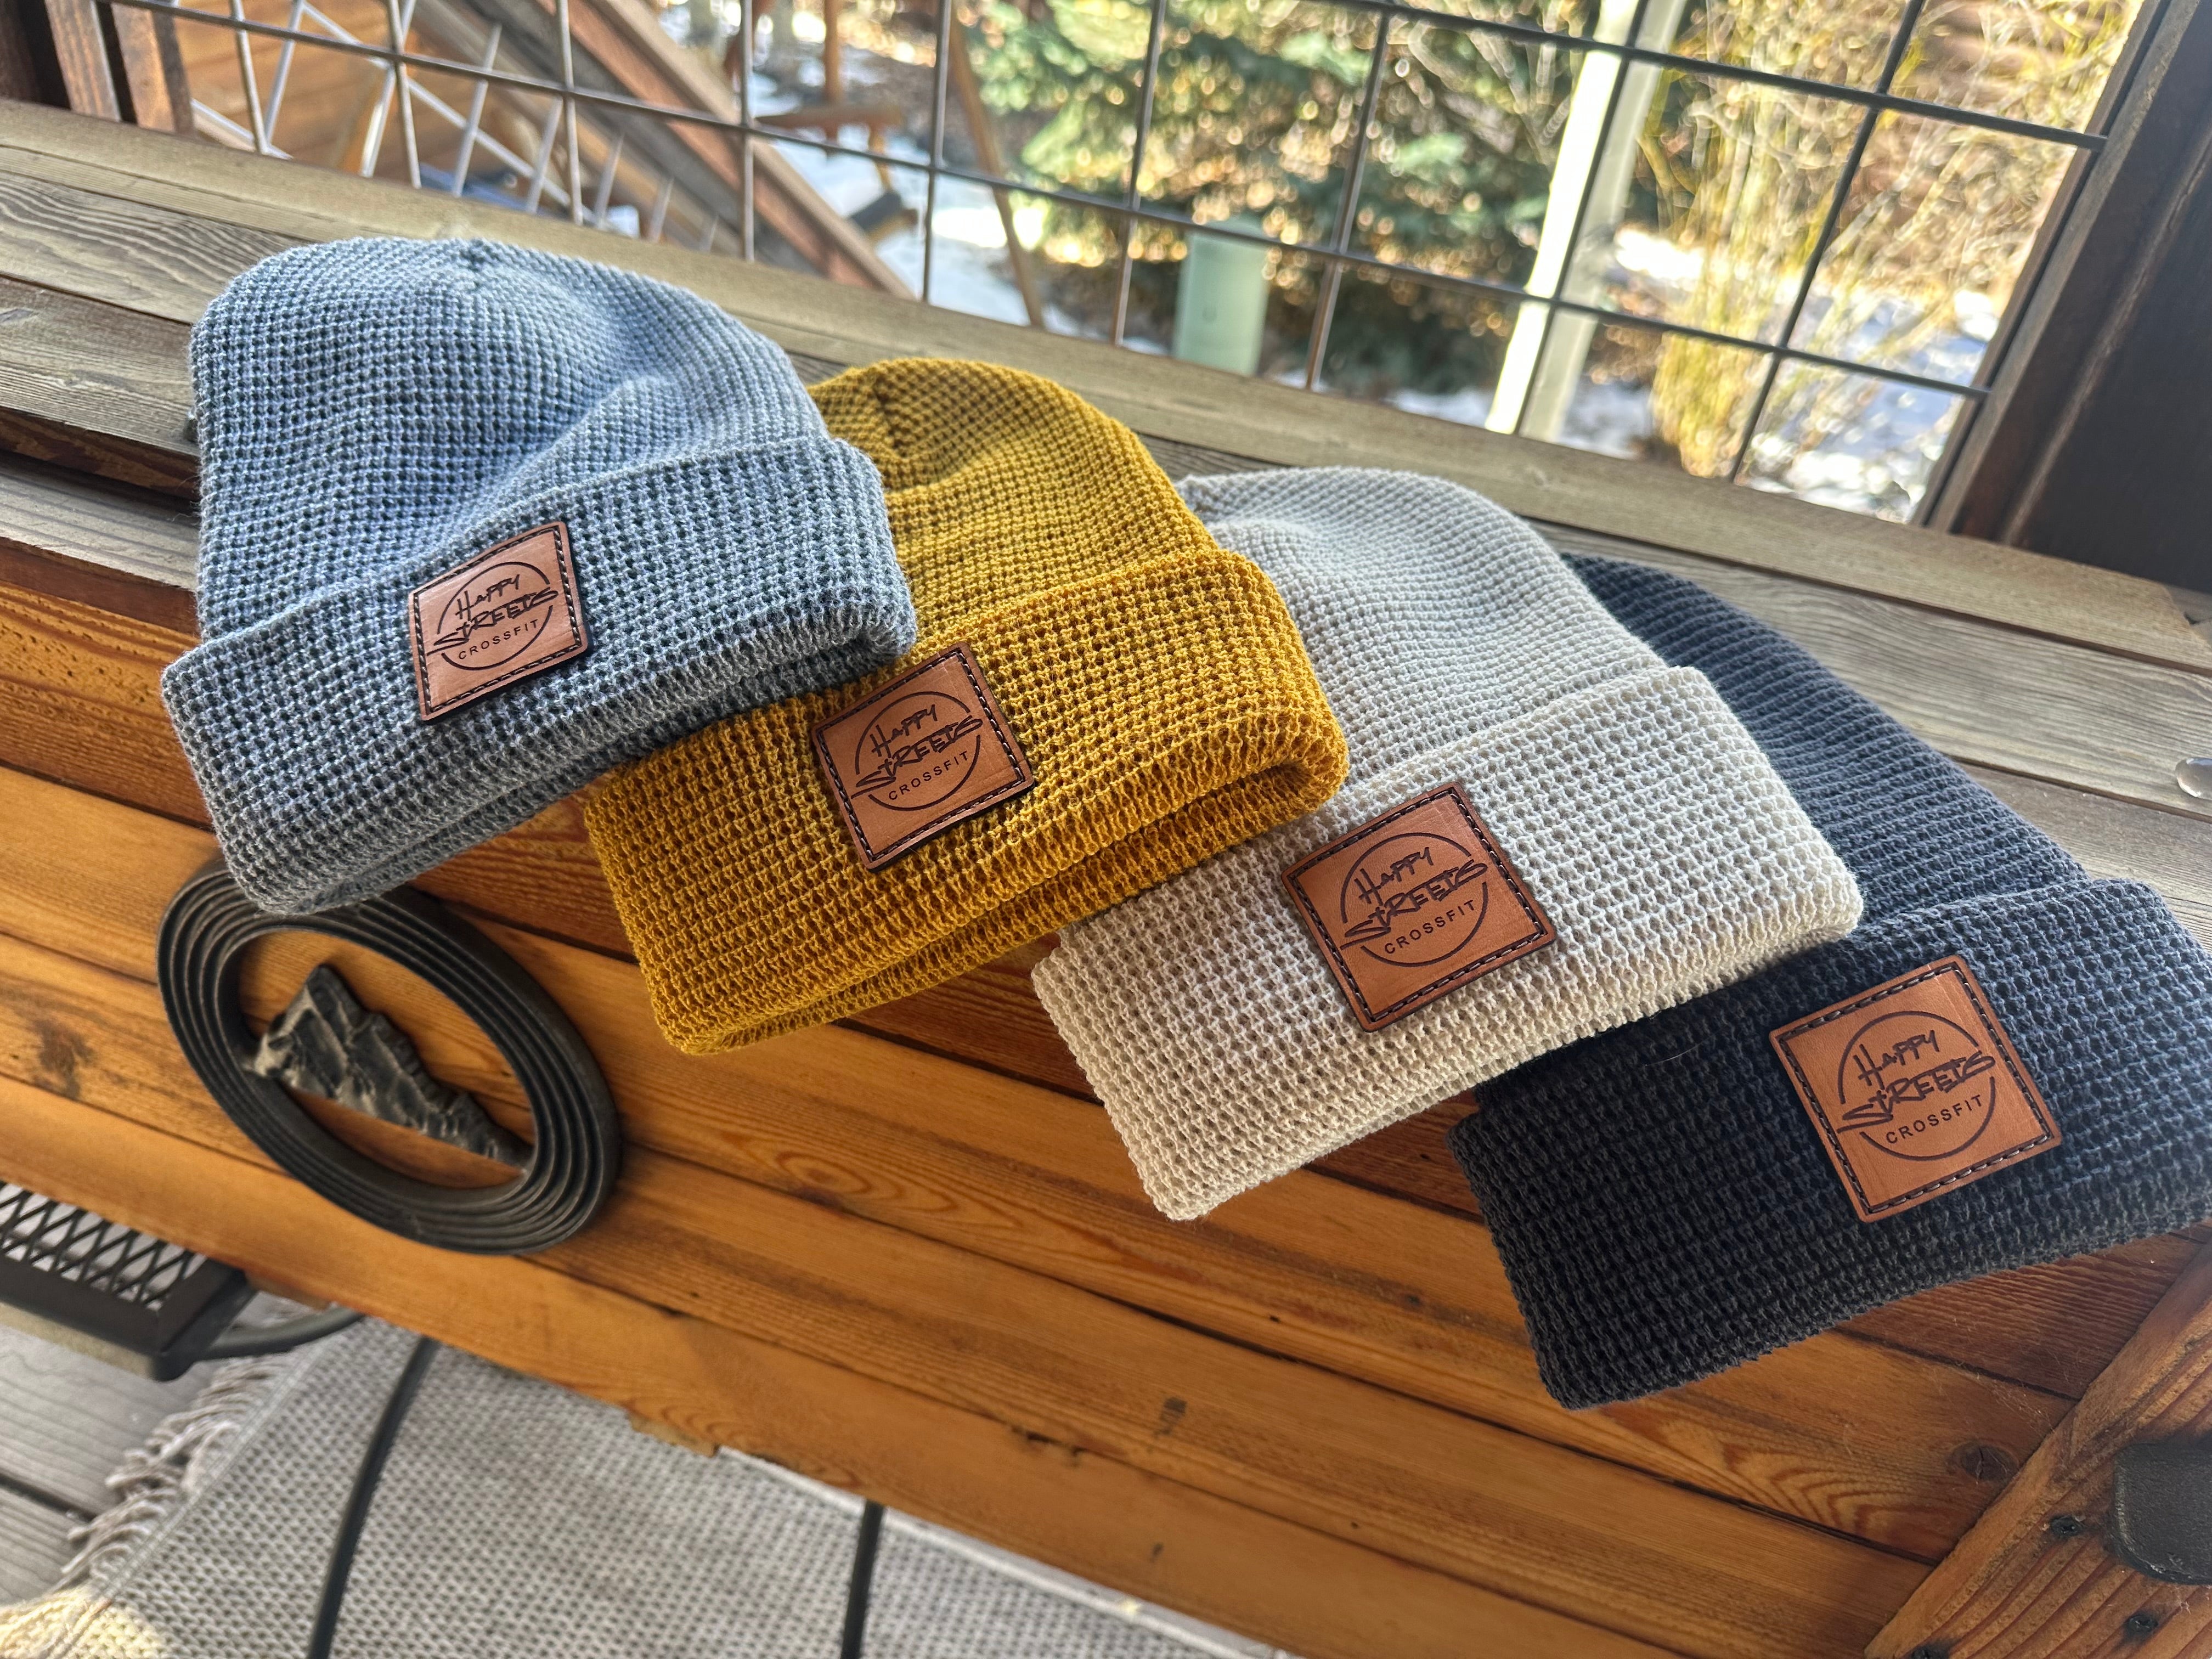
Step 2: Select a Leather Patch Shape and Placement
The leather patch is the star of your custom hat. Choosing the right shape and placement can elevate your design.
-
Popular Patch Shapes:
- Circle: A versatile, timeless choice for logos or monograms.
- Square: Ideal for bold, symmetrical designs with text.
- Rectangle: Great for longer text or horizontal graphics.
- Custom Silhouettes: Add personality with shapes that reflect your brand or theme.
-
Placement Options:
- Front Panel: The classic choice for high visibility.
- Side Panel: Perfect for subtle branding or secondary designs.
- Back of Hat: Great for event dates or additional text.
![]()
Pro Tip: Centered patches on the front panel are the most popular and versatile option, but side-panel placements can add a modern twist.
Step 3: Design Your Patch
Your patch design is what makes your hat truly unique. Whether it’s a logo, graphic, or text, the right design will make your custom hat stand out.
-
Design Inspiration:
- Logos or branding for small businesses.
- Outdoor-themed graphics like mountains, wildlife, or compasses.
- Personal touches such as initials, monograms, or meaningful quotes.
-
File Format:
- Use vector files (EPS, AI, PDF, or DXF) for crisp, precise engraving.
- Avoid raster files like PNG or JPEG, as they can lose quality during engraving.
Step 4: Pick Your Colors
The color of your hat and leather patch should work together to create a cohesive look. Here are some combinations to consider:
-
High Contrast:
- Dark hats (black, navy) with light leather patches (tan, natural).
- Light hats (khaki, gray) with dark leather patches (brown, black).
-
Monochromatic:
- Hats and patches in similar tones for a sleek, understated design.
Pro Tip: Think about the setting where the hat will be worn. Bright colors can stand out at events, while neutral tones work well for everyday wear.
Step 5: Review and Finalize
Before placing your order, double-check the following:
- Design Accuracy: Make sure your design looks exactly how you want it.
- Placement and Size: Ensure the patch size and placement fit the style of your hat.
- Order Details: Confirm you’ve selected the right quantity and hat style.
Frequently Asked Questions About Designing Custom Hats with No Minimum
Q: Can I order just one custom hat?
A: Yes! Outer Wings offers custom hats with no minimum order requirements, so you can create as few or as many as you need.
Q: What type of design works best for leather patches?
A: Bold, simple designs like logos, initials, or outdoor-inspired graphics work best. Intricate details may lose clarity when engraved.
Q: Which hat style is best for outdoor activities?
A: The Richardson 112 and 935 are great for outdoor use due to their breathable mesh backs and durable construction. The 256 offers sun protection for long days outside.
Q: How do I ensure my design looks professional?
A: Use vector files (EPS, AI, PDF, or DXF) to ensure sharp, clean engraving. Avoid raster files like PNG or JPEG.
Q: Can I customize the leather patch shape?
A: Absolutely! You can choose from standard shapes like circles and squares or create custom silhouettes that match your design.
Conclusion: Design Like a Pro with No Minimum Orders
With no minimum order requirements, designing custom hats with leather patches has never been easier—or more fun. By choosing the right hat style, patch shape, and design, you can create a custom hat that’s perfect for any occasion, whether it’s for personal use, gifting, or branding.
Ready to get started? Explore Outer Wings’ collection of custom hats with no minimum orders and start designing your one-of-a-kind creation today!